


Uncategorized
What Is Vulnerability Management and How Does It Work?
Aug
What Is Vulnerability Management and How Does It Work?
An explainer on vulnerability management and how it works in practice—clarify vulnerability vs. risk, understand why findings pile up, walk the core loop from inventory to remediation, compare discovery methods (scanners, agents, SCA/SBOM, posture), and learn modern prioritization using exploitability, exposure, and exceptions.
If your security program is “running scans,” why do the same issues keep coming back—and why do the most urgent ones still slip through? The problem isn’t a lack of tools; it’s that scanning without context turns into an endless backlog and noisy reporting.
This explainer breaks vulnerability management into a repeatable operating loop. You’ll see where it fits in the broader security stack, how accurate asset inventory and detection methods shape what you can trust, and how prioritization turns raw CVEs into actions your teams can actually complete.
Define the problem
Vulnerabilities persist because real systems change faster than teams can verify them. Finding weaknesses is cheap; fixing them touches owners, uptime, budgets, and tradeoffs.
Vulnerability vs risk
A vulnerability is a weakness in code, configuration, or process. Risk adds context: who can exploit it, what breaks, and how likely that path is.
A “high CVE” can be low business risk when the service is unreachable, the feature is disabled, or compensating controls block exploitation. Treat severity as a signal, not a decision.
Why vulns accumulate
They pile up when reality drifts from what you think you run. Most backlogs come from a few repeatable sources.
- Frequent change without validation
- Third-party dependencies and transitive libraries
- Misconfigurations across cloud and SaaS
- Shadow IT outside security workflows
- Incomplete asset inventory and ownership
Fix visibility and ownership first. Your patch queue will shrink on its own.
Management, not scanning
Scanning finds candidates; management turns them into reduced exposure over time. That requires triage, assignment, remediation, verification, and exceptions.
A quarterly scan won’t catch daily deployments or new attack paths. Run it like a control loop, or you’re just generating reports.
Where it fits
Vulnerability management coordinates several disciplines, each with different levers. You need all of them to move from “known” to “fixed.”
| Capability | Primary focus | Typical owner | Output |
|---|---|---|---|
| Vulnerability management | Triage and prioritization | Security | Remediation plan |
| Patch management | Update software versions | IT / Platform | Deployed patches |
| Configuration management | Harden settings | IT / Cloud | Baselines, drift fixes |
| Incident response | Active exploitation | SecOps | Containment actions |
| Governance | Policy and exceptions | GRC | Risk acceptance |
When these don’t connect, vulnerabilities become paperwork. When they do, they become work.
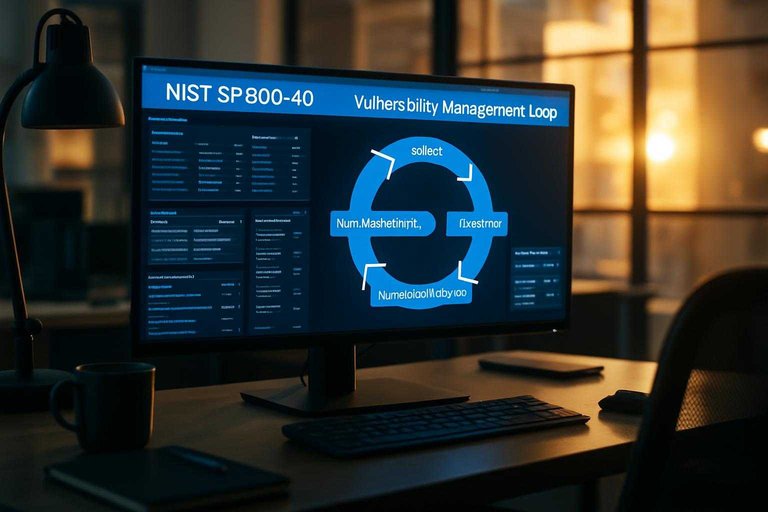
Core loop overview
Vulnerability management works because it repeats. Each pass turns new security signals into prioritized fixes, then verifies they stuck.
- Collect inputs: asset inventory, scan results, threat intel, and business context.
- Normalize and enrich: de-duplicate findings, add ownership, map to apps and services.
- Prioritize work: weigh exploitability, exposure, and operational impact.
- Remediate or mitigate: patch, reconfigure, segment, or add compensating controls.
- Validate and feed back: rescan, confirm closure, and tune rules and scope.
If your loop ends at “scan,” you have visibility, not risk reduction. This is consistent with the lifecycle approach in NIST’s enterprise patch management guide. If you also run a public intake for external reports, align the “collect → triage → validate” steps with a 2026 VDP platforms buyer’s guide.
Asset inventory mechanics
Asset inventory is the part where vulnerability management becomes real. If you can’t prove what you own, you can’t prove what you covered.
Most programs build inventory by combining multiple discovery feeds, then reconciling them into one set of assets. That single set is what your scanners, agents, and dashboards treat as “in scope.”
Discovery sources
You need several inventory feeds because each one lies in a different way. Combine them so gaps in one source get caught by another.
- Cloud APIs for instances, images, and security groups
- CMDB records for planned and owned systems
- EDR agents for active endpoints and servers
- Network scans for reachable IPs and open services
- CI/CD systems for built artifacts and deployments
Add SaaS admin logs too, or shadow tools will quietly become production.
Normalization and identity
Raw discovery creates duplicates, conflicts, and half-truths. Normalization turns “many names” into one asset you can scan and track.
Entity resolution usually links hostnames, IPs, instance IDs, and container IDs into one record. It also handles churn, like a new IP after a reboot, without creating a “new” server.
If identity is shaky, every metric you report becomes negotiable.
Ownership and scope
Inventory without ownership is a list of problems nobody has to fix. Ownership mapping connects assets to teams, services, and environments so remediation has a home.
Tags and service catalogs typically drive responsibility, SLAs, and routing. They also define scope boundaries, like production versus dev, and approved exceptions with an expiration.
Treat missing tags as a vuln, because they create permanent “not my job” zones.
Coverage gaps
Blind spots don’t announce themselves. You spot them by looking for assets that exist somewhere, but never show up in scan results.
- Endpoints without an agent installed
- Workloads that appear and disappear quickly
- Assets that never touch your corporate network
- SaaS apps bought outside procurement
- IP ranges excluded “temporarily”
If you can’t explain a gap, you don’t own your coverage.
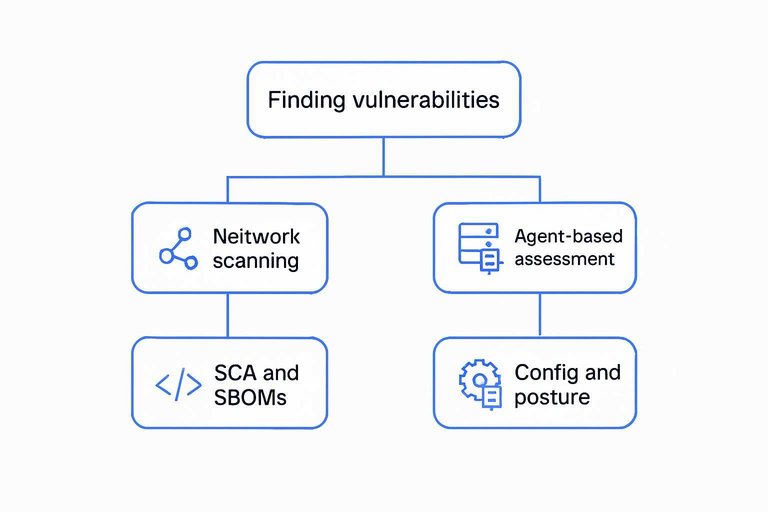
Finding vulnerabilities
Vulnerability tools find issues by observing signals, then matching those signals to known weaknesses. Results differ because scanners see different layers, and each layer lies in its own way. Platforms like Hacknexa.io (based on its likely focus on scanning, testing, and reporting workflows) can help teams reconcile those layers by centralizing findings, adding remediation context, and tracking what’s been verified versus inferred.
Network scanning
Network scanning finds issues by probing reachable services and inferring what runs behind an IP. It’s fast and low-friction, but visibility depends on what the network lets you touch.
Scanners send packets, then read responses for open ports, protocols, and service quirks. They often do banner grabbing, which is just asking a service to identify itself. With credentials, they can log in and verify patches, configs, and installed packages.
Firewalls and NAT can turn “secure” into “invisible,” and invisibility changes your risk math. That’s why it helps when scan results flow into a workflow that distinguishes “no finding” from “no visibility,” and captures where credentialed validation did (or didn’t) happen—an area tools like Hacknexa.io typically aim to support through triage fields, status, and reporting.
Agent-based assessment
Agents detect issues from inside the host, where the truth is usually clearer. They take more effort, because you must deploy and maintain them.
They enumerate local packages, loaded modules, and running processes instead of guessing from a port. They map kernel and OS versions to advisories, including vendor backports and patch levels. They can also validate file permissions, registry keys, and local security settings.
If your network view is a silhouette, agents give you the X-ray. Practically, the value shows up when you can correlate that “X-ray” evidence with external scan signals and keep a clean record of what was confirmed on-host versus inferred remotely—especially if your reporting and remediation guidance roll up both views in one place.
SCA and SBOMs
SCA and SBOMs target code and dependencies, not hosts. They catch risks that never show up on a port scan.
- Build dependency graphs from manifests and imports
- Use lockfiles to pin resolved versions
- Generate SBOMs for release artifacts
- Diff builds across repos and branches
- Flag vulnerable transitive libraries
If you ship the library, you own the risk, even when no server “looks vulnerable.” Where teams struggle is operationalizing this alongside infrastructure findings; having a consistent intake and triage workflow (with exportable reporting for audits and remediation planning) makes it easier to treat dependency risk as first-class—not a separate spreadsheet exercise. For practical guidance, see OWASP’s Dependency Graph & SBOM Cheat Sheet.
Config and posture
Config and posture checks find weaknesses in “how it’s set,” not “what it is.” They work by comparing reality to policies and known-good baselines.
Tools evaluate settings against rules like CIS-style benchmarks, internal standards, and regulatory controls. In cloud, they query control-plane data, like IAM policies, security groups, storage ACLs, and encryption flags. That catches exposure even when workloads are ephemeral or serverless.
Most breaches start with a bad decision in configuration, not a zero-day. The operational challenge is turning “policy drift” into accountable fixes; products that combine findings with remediation guidance and status/ownership tracking can reduce the gap between posture alerts and actual change control.
False positives/negatives
Every detection method has blind spots, and some are self-inflicted. Knowing the common failure modes keeps your program honest.
- Version backports confuse naive version checks
- Incomplete credentials block deep validation
- Transient services appear, then vanish
- Scan timing misses short-lived changes
- Signature limits miss novel variants
Treat findings as hypotheses until you can reproduce them on the asset. It also helps if your workflow captures “evidence” and “verification state” (e.g., unverified, reproduced, mitigated, accepted risk) so noisy scanners don’t drown out what’s real—something security workflow/reporting layers such as Hacknexa.io often try to formalize.
Prioritization internals
Raw findings are cheap. Fixing them is not.
Prioritization is the machinery that turns noisy scan output into a work queue your teams can execute.
From CVE to action
A CVE and a CVSS score tell you what a flaw is and a rough worst-case impact. They do not tell you how urgent it is in your environment.
Imagine the same CVE on two hosts: one is internet-facing with no WAF, the other sits behind strict network controls. Add compensating controls like patching cadence, EDR coverage, application allow-listing, and segmentation, and urgency can flip.
Treat CVSS as a starting label, then let context decide the order.
Exploitability signals
Exploitability is about proof, not possibility. You want signals that an attacker can and will use it.
- Listed in a KEV catalog
- Public PoC code available
- Ransomware crews targeting it
- Active internet scanning observed
- Viable internal attack path
When two findings tie on severity, exploit signals should break the tie.
Exposure and reachability
Exposure answers one question: can an attacker actually reach the vulnerable code. Severity without reachability creates busywork.
Internet-facing services raise urgency fast. So do lateral-movement paths, high-privilege execution contexts, and “adjacent” systems that share credentials or trust.
Map findings onto your attack surface, then prioritize what’s reachable first.
Risk scoring model
A scoring model keeps triage consistent across teams. Keep it simple, then refine when you have stable inputs.
- Set Severity = CVSS band or internal severity tier.
- Set Exploitability = KEV, PoC, active exploitation, or none.
- Set Exposure = internet-facing, reachable internal, or isolated.
- Set Asset Criticality = revenue, safety, identity, or core operations.
- Compute Risk Score = Severity × Exploitability × Exposure × Criticality.
The math matters less than the habit: same inputs, same decisions.
Handling exceptions
Some findings should not be fixed immediately. Exceptions prevent your queue from becoming fantasy work.
- Vendor constraints block patching
- Uptime windows limit change
- Legacy system cannot update
- Mitigation reduces exploitability
- Documented risk acceptance exists
Exceptions are fine, but only with an owner and a review date.
Remediation and Verification
Prioritization decides what to fix first. Remediation and verification are the steps that actually close the loop: you change the environment, confirm the change removed (or reduced) the risk, and produce evidence that the issue is either fixed, accepted, or still pending with a clear owner and next action.
In a mature vulnerability management program, every finding ends up in one of a few states:
- Remediated (the weakness is removed)
- Mitigated (risk reduced via compensating controls)
- Exception/Accepted risk (formally approved with rationale and expiration)
- False positive (validated as not applicable)
- Deferred (time-bound with an explicit plan)
The key is consistency: use the same workflow for infrastructure, cloud, endpoints, containers, and applications so your team can measure progress and prove outcomes.
Patching and software updates
Patching is the most direct remediation path for many CVEs and product vulnerabilities, but it still needs operational discipline.
- Validate scope and applicability: confirm the affected version/build is actually deployed and reachable in the way the scanner assumes.
- Choose the right update strategy: emergency patching for high-risk exposure; scheduled patch windows for routine fixes.
- Control blast radius: stage changes (dev/test → pilot group → wider rollout) where possible, and document any rollbacks.
- Track dependencies: some patches require reboots, library upgrades, or compatibility checks that can delay closure if not planned.
Configuration changes and hardening
A large portion of findings are configuration-driven (weak crypto settings, exposed services, permissive IAM, missing headers, insecure defaults). These often can’t be “patched” and require a controlled change.
- Treat configuration as code when possible: use templates, policies, and baselines so fixes stay fixed.
- Prefer systemic controls over one-off edits: a hardened image, enforced policy, or central configuration management prevents drift.
- Document the intended secure state: a remediation should define the target configuration (what “good” looks like), not just the current flaw.
Exception handling (risk acceptance and compensating controls)
Not every vulnerability can be fixed immediately—legacy systems, vendor constraints, uptime requirements, or business-critical applications can block quick remediation. This is where exception handling protects you from “paper closure.”
A good exception is:
- Time-bound: includes an expiration date and review cadence.
- Specific: scoped to the exact asset(s), vulnerability, and exposure conditions.
- Owned: an accountable business/technical owner is named.
- Justified: includes rationale and what compensating controls reduce risk (e.g., network segmentation, WAF rules, reduced privileges, monitoring/alerting).
Avoid blanket approvals like “accepted for six months” without scope, controls, or a plan—those turn into permanent risk.
Retesting and verification (prove the finding is closed)
A vulnerability isn’t closed because a ticket says it is; it’s closed when verification shows the risk is gone or reduced.
Verification methods commonly include:
- Rescan/reattest: run the same scanner check and confirm the signal is cleared on the affected asset.
- Manual validation: confirm version, configuration, or exploitability when automated tools are ambiguous.
- Control validation for mitigations: if you used compensating controls, verify they are active and effective (e.g., blocked paths, enforced policies, monitored events).
When a finding persists after remediation, capture what changed and what didn’t—this speeds root-cause analysis (wrong asset, incomplete rollout, configuration drift, cached results, or a detection mismatch).
Reporting and evidence (show risk reduction over time)
Reporting is where vulnerability management becomes operationally useful for security, IT, and compliance. Focus reports on outcomes and accountability, not raw counts.
Common reporting artifacts include:
- Remediation status by owner/team: open vs. fixed vs. exception, with aging.
- Time-to-remediate tracking: measured consistently per severity and asset criticality.
- Exception register: what was accepted, why, for how long, and what controls apply.
- Verification evidence: scan outputs, change records, and retest notes tied to each closed item.
The goal is a defensible trail: what was found, what was done, when it was verified, and what risk remains.
Turn Findings Into a Repeatable Program
- Start with assets: confirm what you own, who owns it, and how complete your coverage is before you debate severity.
- Layer detection: combine scanning, agents, SCA/SBOM, and posture checks so you catch both software flaws and misconfigurations—then tune to reduce noise.
- Prioritize by reality, not just CVSS: weigh exploitability signals, exposure/reachability, and business context to decide what gets fixed first.
- Close the loop: route work to the right team, verify remediation, document exceptions with expiry, and feed lessons back into inventory and controls.
Frequently Asked Questions
- Is vulnerability management the same as patch management?
- No—patch management is one remediation tactic, while vulnerability management covers identification, validation, prioritization, remediation planning, and verification across patches, configuration changes, and compensating controls.
- How often should you run vulnerability scans as part of vulnerability management?
- Run scans on a scheduled cadence (at least monthly for most environments) and also after meaningful changes like new deployments, major configuration updates, or adding new internet-facing assets.
- How do you measure whether a vulnerability management program is actually working?
- Track metrics like time-to-remediate by severity and asset criticality, backlog size/age, recurrence of the same weakness, and the percentage of high-risk findings that are verified fixed through rescans or validation.
- Do you need a dedicated vulnerability management platform, or can you manage it with scanners and tickets?
- Many teams start with scanners plus Jira/ServiceNow, but a dedicated platform helps when you need unified deduplication, cross-tool normalization, SLA tracking, and audit-ready reporting across many teams and asset types.
- What can you do if you can’t patch a vulnerability right away?
- Apply compensating controls such as configuration hardening, removing exposure (network segmentation/WAF rules), disabling vulnerable features, tightening IAM, and documenting a risk acceptance with an expiration date and verification steps; tools like Hacknexa.io may help centralize triage status and remediation reporting if you’re managing many exceptions.
Operationalize Your Vulnerability Loop
Once you understand the inventory-to-detection-to-prioritization cycle, the hard part is keeping it running consistently across changing assets and limited team bandwidth.
Hacknexa.io helps you streamline vulnerability assessment and penetration testing with clearer triage, reporting, and remediation guidance—so high-risk issues get fixed faster.
Sources
Written with Skribra
